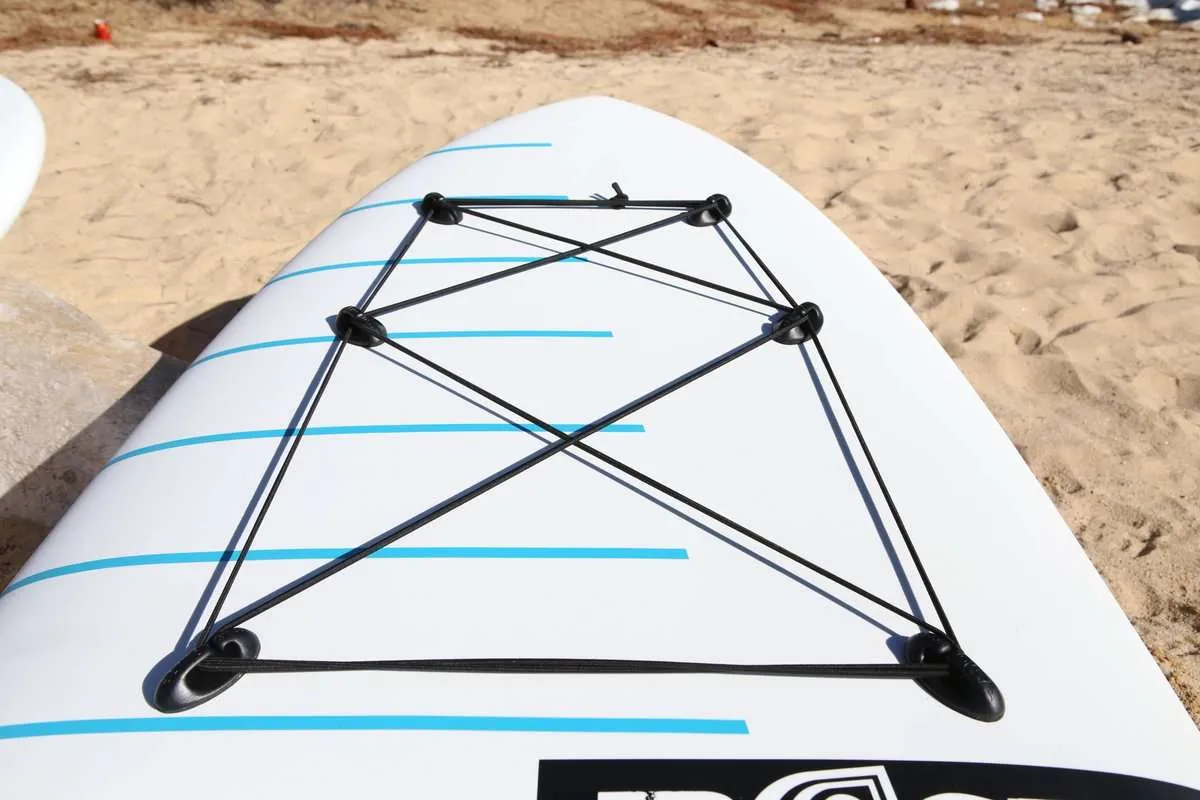
To tie a bungee on a paddle board, thread a length of 3/16- or 1/4-inch shock cord through the four D-rings on the nose in a crisscross (X) pattern, pull both ends tight so they’re even, and tie them together with an overhand knot. If your board doesn’t have D-rings, you’ll need to glue some on (inflatables) or fit stick-on or plug-in mounts (hard boards) first.
Quick answer
- Get about 6–8 feet of 3/16” or 1/4” marine shock cord.
- Start at a D-ring nearest the middle of the board and feed the cord diagonally to the opposite ring near the nose.
- Go straight across to the other nose ring.
- Feed diagonally back to the remaining middle ring, making an X.
- Even up the ends, pull the cord taut, and tie them together with an overhand knot. Trim and seal the ends.
What the bungee is for
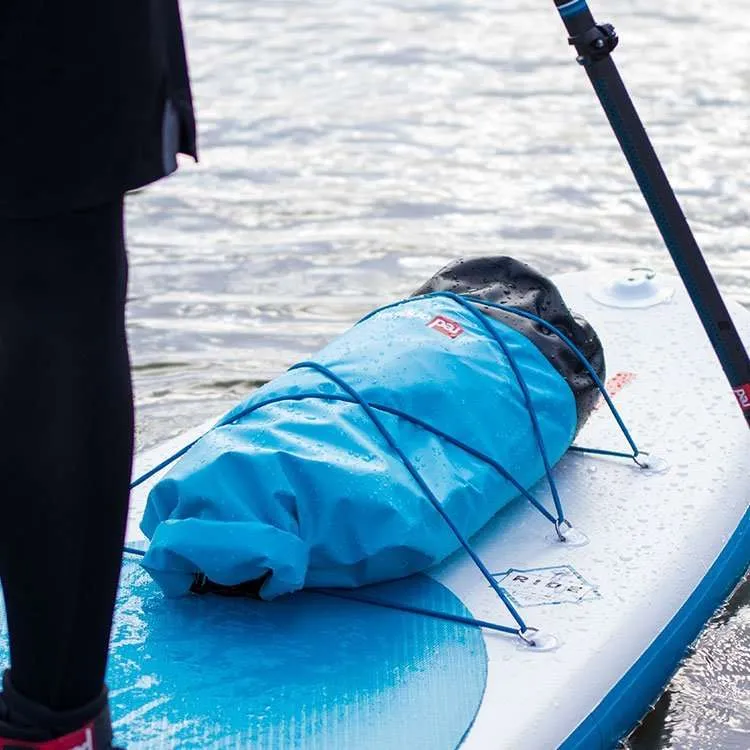
Deck bungees (also called deck rigging) hold gear on the board so it doesn’t slide off or float away if you fall. Typical uses:
- A dry bag with your phone, keys and snacks
- A water bottle
- A jacket or spare layer
- A small cooler (see how to attach a cooler to a paddle board)
- Your paddle, tucked under while you rest or swim
Keep heavy loads low and near the middle of the board so they don’t affect your balance.
What you need
- Shock cord. Marine-grade elastic cord, usually 3/16” or 1/4” thick. Look for a polyester or nylon cover over a rubber core, which resists UV and abrasion better than cheap hardware-store bungee.
- Four D-rings (or other attachment points) already on the board, or a kit to add them.
- Scissors and a lighter to cut and seal the ends.
- Optional: cord locks or end clips, if you want to adjust tension without retying.
How much cord? Measure the path through all four rings and add about a foot for the knot. For a typical nose bungee, 6–8 feet is usually enough.
Step-by-step: tying the bungee
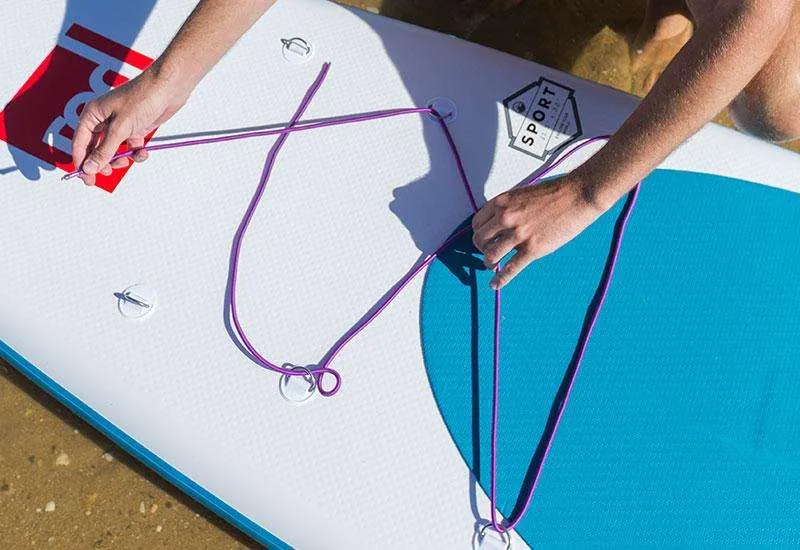
This is the standard crisscross pattern that board makers such as Pau Hana describe in their instructions.
1. Feed the cord from the middle toward the nose
Start at one of the two D-rings closest to the middle of the board. Push the cord through and pull a foot or so through. Then run it diagonally to the D-ring near the nose on the opposite side.
2. Cross over at the nose
Bring the cord straight across the board to the other nose-side D-ring and feed it through.
3. Feed back toward the middle
Run the cord diagonally back to the last D-ring, nearest the middle on the opposite side from where you started. You now have an X across the deck, with a straight bar across the front.
4. Even the ends and tension the cord
Pull both ends so the cord is taut across every ring and the two loose ends are about the same length. It should be tight enough to grip a dry bag firmly, but not stretched so hard that you can’t slide gear underneath.
5. Tie an overhand knot
Hold the two ends together, make a loop, and pass both ends through it. Pull it tight. An overhand knot is simple, compact and hard to shake loose. Trim the tails to an inch or two, then melt the cut ends briefly with a lighter so the cover doesn’t fray. Let the knot sit on the deck, not right next to a D-ring where it could pull through.
Other patterns
- Ladder or zigzag: good for six or more D-rings on a long touring board.
- Two straight bars: fine for holding a paddle or a single bag.
The X is the most versatile for a typical four-ring setup.
No D-rings? How to add them
On an inflatable board
Glue on PVC D-ring patches. Kits usually include the rings, PVC glue and a brush. Paddle North’s instructions are typical:
- Clean and dry the area thoroughly. Mark where each patch goes. Keep them on the smooth PVC, off the deck pad.
- Brush glue onto both the patch and the board, and let it go tacky.
- Press the patch firmly into place.
- Let it cure for 12–24 hours before you put any load on it.
Make sure the patch material matches your board (most are PVC; a few premium boards use other materials). Some paddlers use a stronger two-part PVC adhesive for rings that will take heavy loads. Follow the glue’s own instructions and work in a ventilated space.
On a hard board
Hard (epoxy) boards have two main options:
- Adhesive mounts or pads, which stick to a clean, smooth area of the deck. They’re easy and don’t need drilling, but are best for light loads.
- Screw-in plugs, set into holes drilled into the board and sealed with resin. They’re the strongest option, but drilling a hard board means breaking the waterproof shell, so it’s a job for a board repair shop if you’re not confident.
Some boards, like Pau Hana’s, use built-in threaded mounts where D-rings simply screw in. Don’t overtighten the screws.
Caring for your bungee
- Rinse it with fresh water after salt water.
- Store it out of the sun where you can. UV is what makes shock cord brittle and slack.
- Replace it when it sags. Shock cord loses stretch after a season or two of heavy sun. It’s cheap and takes five minutes to rethread.
- Don’t overload it. A bungee holds a bag in place. For heavy gear like a cooler or fishing crate, add straps to extra D-rings.
FAQ
What size bungee cord do I need for a paddle board?
Most boards use 3/16” or 1/4” shock cord. Thicker cord is stiffer and holds heavier gear, thinner cord is easier to thread. Check the D-ring opening, since some small rings only take 3/16”.
How do you tighten a bungee on a paddle board?
Untie the knot, pull more cord through the rings to take up the slack, and retie. A cord lock lets you adjust tension without untying.
Can I add D-rings to an inflatable paddle board?
Yes. Glue-on PVC D-ring patches are made for this. Clean the area, use PVC glue, and let it cure for 12–24 hours before loading it.
What can I use the bungee for besides storage?
Some families use the front bungee as a handhold for a child sitting on the nose. It’s not a substitute for a life jacket. See how to paddle board with a baby. For more gear ideas, our best inflatable paddle board accessories and best dry bags for paddle boarding roundups are good places to start.